RAW Workflow, Iridient & the Leica T

With the Leica T starting to ship it seemed to be worth writing this short article about my own RAW (dng) workflow solution - which may or may not be helpful to you. Forgive me in advance - I’m not really a great technical expert, and this article is meant to be directed at others with a similar skill set :)
There are two issues for which this article provides a reasonably simple solution.
1. Apple Aperture (and iPhoto) do not support the DNG files of the Leica T yet
The Leica T comes with a free copy of Adobe Lightroom, which is fine if you like Adobe Lightroom, but there are two major DAM (digital asset management) software solutions available. Apple Aperture is also popular, but does not support the version of DNG file (1.3) which Leica use for both the Leica T and the Leica XVario. This will probably change in the future, but having waited a year for support of the Monochrom, and even longer for non-support of the XVario I thought it would be good to find another way around the problem.
Incidentally, I think this is Apple’s fault - they SAY that they support DNG, but this is only the initial, pre 2012 version. Version 1.3 is pretty universally used and accepted now, but is not supported by Apple - either at operating system level, or within Aperture or iPhoto.
-
2.Lens Corrections are applied by default in jpg, Lightroom and Adobe Camera RAW
Of course, this is a good thing, it allows for smaller lenses and better images. It was first used by Hasselblad with their 28mm lens, but is now pretty much universal.
The idea is that you don’t have to make complicated optical corrections to avoid barrel and pincushion distortion in lenses - you simply tell the image processor the focal length and aperture, and the software straightens things out. The downside is a slight loss of resolution in the corners where the image is being ‘stretched’. To be honest, this isn’t often a great problem, but in some situations (landscape for instance) it really isn’t necessary to correct the distortion - but it may be good to keep the maximum resolution. Neither Lightroom or Adobe Raw allow you to ignore these optcodes. Aperture of course only reads the jpg files, where the corrections are ‘cooked in’ when the photo is taken.
Iridient has been around since 2004, it’s a very well respected RAW converter especially renowned for getting the very best detail out of files - it’s very much enamored of Fuji users, doing an excellent job with the Xtrans sensor. The tool set is easy to use and very efficient. . . . . and, significantly it has the option to either include, or exclude the lens correction information in DNG files.
The latest version of Iridient (version 2.4) has a couple of extremely well though out options to make it integrate really well with both Adobe Lightroom and Apple Aperture.
First of all - As a Plugin
You can elect to use Iridient as an external editor in both Aperture and Lightroom. However, it has a special trick up it’s sleeve: Normally, if you choose to use a plugin, or an external editor, then Aperture will create a .TIF file which the external editor then uses, when you return to Aperture (or Lightroom) this file will show up as a version alongside the original.
The ‘special trick’ is that when you choose to use Iridient as an external editor, as usual, Aperture will create a .TIF file for editing. However, Iridient will look for a RAW file in the same folder, and it will use that RAW file instead of the .TIF file - this allows you to process the RAW file in Iridient. When you have finished, there is a menu option within Iridient which will overwrite the .TIF file Aperture created, with any adjustments you’ve made (including a lack of lens correction if you’ve chosen that.
However, there are a couple of settings you do need to change in both Aperture and Iridient.
Setting up Iridient to Work with Aperture

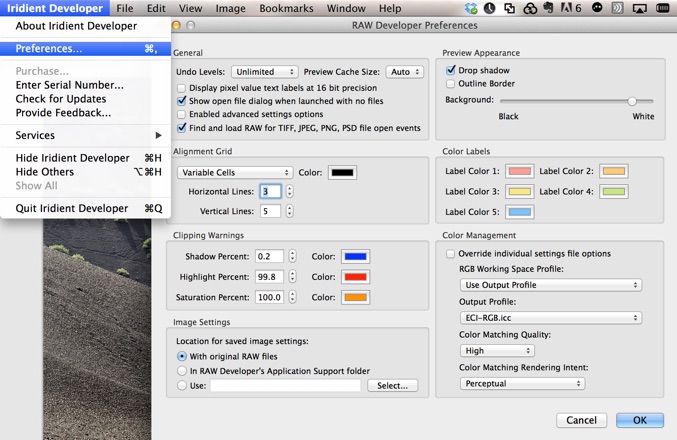
Setting up Preferences in Iridient
The important check box here is the ‘Find and Load RAW for TIFF, JPEG, PNG, PSD file open events. This means that even though Aperture has instructed Iridient to use the .TIF file it created, Iridient opens and loads the DNG file that the Leica T has created.
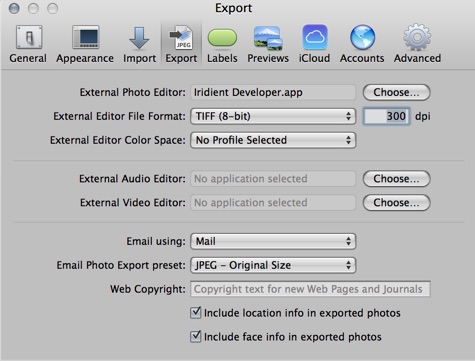
Setting up Preferences in Aperture
Here you need to select Iridient Developer as your external photo editor - click on the choose button and choose Iridient from your Applications folder - you can choose 16 bit TIFF if you want, but as the file will be overwritten anyway, you may as well stick to 8 bit which is faster.
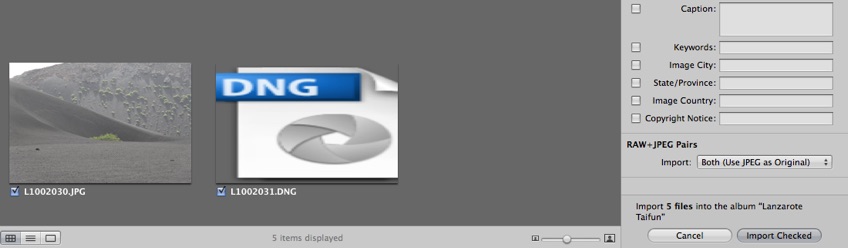
Importing Leica T files to Aperture
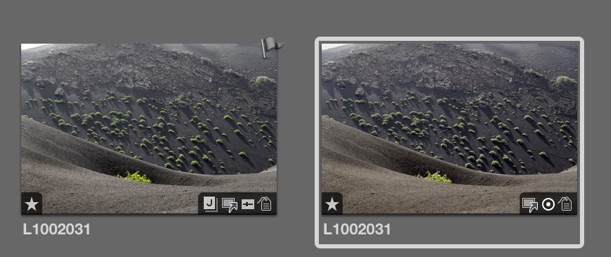
You need to set your Leica to shoot DNG + jpg (I use the best quality jpgs as they are often good enough). When importing to Aperture choose to import jpg - Aperture won’t show a thumbnail for the DNG file - you should choose RAW+JPEG Pairs - and choose Import both, Use JPG as original.
This works well, because when Apple finally get their act together you can simply right click on the image (or a group of images) and choose ‘Use RAW file as master’
Editing the file with Iridient
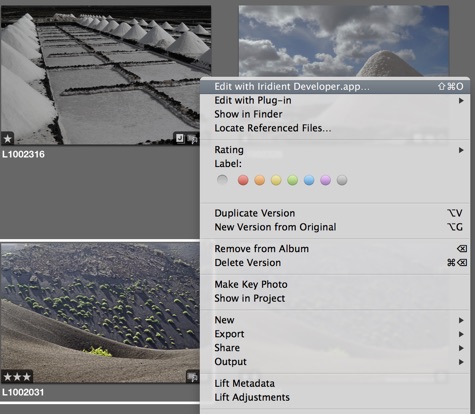
Right click on the jpg file in Aperture, and then select Edit with Iridient Developer.app (above)
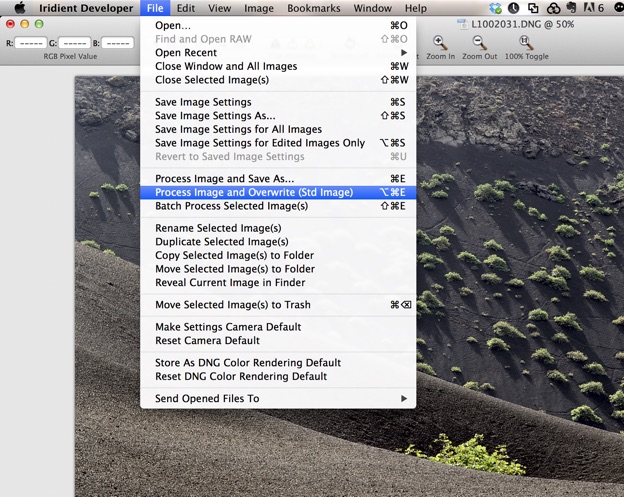
you can then make changes as required in Iridient. When you have the file as you like it, Click on File and choose Process Image and Overwrite (Std Image). When you do this Iridient will overwrite the .TIFF file which Aperture produced from the jpg (the DNG and original jpg will be quite untouched). See below.
Back in Aperture
Now you have the original jpg file (with any modifications you may have made before) and also a second version which is the .TIF file which Iridient created from the DNG.